Manipulating the images for my double page spread
FIRST IMAGE
 This is my first stage, I began by placing the image I wanted into Photoshop, so I am able manipulate it the way I want.Then using the 'Polygonal tool' I selected the areas I don't need such as the background. However, the background is such a large area therefore I then decided to do the opposite way in order to make the progress much faster. As seen through this screenshot I have selected the model only, as he is much easier to crop around and less space making it easier and quicker.
Then I moved on to going on the category 'select' and clicking on the button 'Inverse'. As shown through this screenshot. This will easily do the work for me, which is selecting all the opposite areas (parts I did not select), meaning the background. This is much faster and has helped me finish much quicker.

After I have selected the areas I don't need I now can erase them. I did this by click on the 'Eraser tool' adjusting the size and hardness of the brush to 100% for both as seen, this allowed me to make sure I remove all the unwanted areas.
This stage shows how I have removed all the background. Due to the steps I have just completed. However as you can see through this screen shot I haven't really cut out the whole background properly around the model and behind his arms. I have done the deliberately because I wanted to start of by taking off the large areas and then I will focus on the more small and difficult parts. This is because these parts will need to be done very carefully and thoroughly. If not, it will look very unprofessional and when I place it onto InDesign the viewer will easily be able to tell it is manipulated.
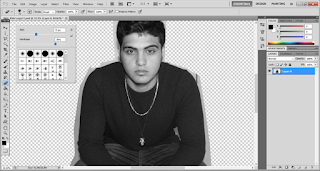 For my fifth stage I am going to start erasing off all the small and hard areas around the model. I will be doing this by adjusting the size and hardness of the brush making it very small so I can easily go around the model without accidentally rubbing off part of him. While doing I kept changing the size and hardness of the brush depending on each area and what suited best. I also had to zoom in a lot in order to really get them small areas and see it easily. Also by doing this my finally outcome won't have sharp edges and won't look scruffy. But will be smooth and won't look like I manipulated it.
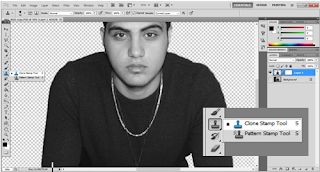
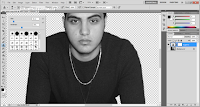
After I finished cutting all around him perfectly, I moved on to smoothing out his face slightly. This two screen shots show this process. I did this by selecting the 'Clone stamp tool'. This tool will enable me to select the smooth parts of his face and add the same feature to the other areas. For example, he had a spot on one part of his space I selected the smooth part (the tool will copy that part) and then I placed it on top of the spot (pasting that selected area) making his face look clear and smooth. To make sure it looks very good I kept adjusting the size and hardness of the brush to make sure I don't make it too harsh as that will show. This is also a good feature as it would ruin the lighting and shades on his face.
Now I have completely finished manipulating
this first image for my double page spread. For the next part I am going to repeat some of these processes to my other image. This is to make it look professional and have a successful final outcome.
SECOND IMAGE
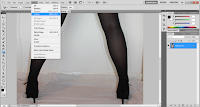
For the first stage of this image I began doing the same thing as I did for the first image, cropping out the background. I first started off by selecting the areas I don't need. However, in the screen shot it shows me selecting the women's legs but later on I will inverse that. So I used the same tool 'Polygonal tool' to enable me to do what I want. Then in the second screen shot it shows me going on to the 'select' category as before and clicking on 'Inverse', which will select all the opposite parts, which is the background.
Now all I have to do is press on the 'Erase tool' and then all the areas I have selected will be gone as seen through this screenshot. However, like my previous photo not all of the background has gone. So I will need too zoom in and start erasing all the rest carefully making sure I don;t ears and parts of her legs, and in the next screen shot I will show how I am going to do so.
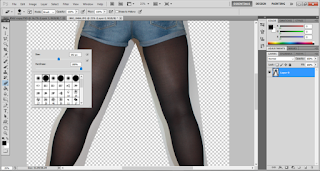
This stage of my manipulation shows how I have selected the eraser and adjusting the size and hardness in order to zoom in and start rubbing out all the unwanted bit around the legs. I done this very slowly and thoroughly to really make sure I don't mess anything up and it looks very smooth with no sharp edges.
This is a screenshot just showing my final out come and how I have finished removing all the background. As you can see it is very neat and well cut no ruff and sharp areas.

This screenshot shows how I will be changing my image into black and white. I first started off by going on to the category 'Image' then 'Adjustment' and finally clicking onto 'black & white'. I am going to change my image into black and white because I want it to look good with the other image, so for that reason the colours will need to be the same. Also the other image, of the artist (model) is the main focus, therefore this image can not take away the focus too much, so it needs to be in black and white in order to do that. This will get my audience to immediately see the artist when looking at the photo and then seeing the legs of the women.
After I was done selecting what I want no I am able to play around and experiment with the different levels in order to get the correct contrast of black and white that I want. While I was doing it, I only had to adjust some of the colours not all to get me the correct tone of black that I wanted.
Now that I have finished leveling the different colours and got the perfect black and white contrast that I wanted, I straight away moved on to cropping the image so it suits well with the model.

Here I was cropping out the image so then it will be easy for me to place it on top of the other photograph. I decided to crop out the shorts as I don't need them to be shown in my overall image. This is because it won't look good and the image will not be the way I want. In addition, removing the upper part will allow me to have more space for the model to be placed in. However, If left it the image of the model won't be shown fully. This takes away the focus and won't look professional cropping out parts of him when he is meant to have all the attention.
At this stage I was placing the image of the legs on top of the other image (model). While I was doing this I had to play around slightly with size and placement until I found the correct and best place for it to be in. In the screenshot you can see when I have complete finished arranging it and this is where it is going to be placed.
After I finished I realised the model looks like he is floating, this is because I removed the background. So for that reason I had to do one last touch before finishing it completely. This was adding a plain black background between his legs, so it looks like he is sitting on something. This was very quick and easy to do. All I needed to do is select the area I need ruffly, using the 'Polygonal tool'. Then selecting on the 'Paint bucket' and colour I want, and finally clicking on the area I have highlighted turning it into black.
This is my final out come, I will not be doing anymore manipulation to this image as everything is well done and perfect. However if I come across any problems I will to reconsider that. I am very pleased with my outcome as everything worked as I planned. This will definitely relate to my article and go with the theme. In terms of background colour, I will be adding this on InDesign when I move the image and place it their.


No comments:
Post a Comment